The tramway at this point can be easily picked up from the Manaton road and from here a good exploration of the complete moorland section of the tramway can be undertaken.
|
The tramway at this point can be easily picked up from the Manaton road and from here a good exploration of the complete moorland section of the tramway can be undertaken. |
Points S. |
Siding between Points R and Q. |
|
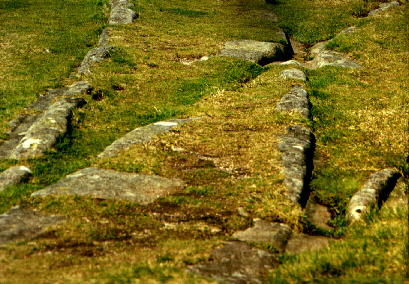
The track runs across an embankment after Points Q for about 35 metres.
This embankement is only about 1 metre above the nominal ground level at
any one point and crosses what appears to be old stream tin workings. The track
on the south western side of the embankment shows further indentations indicating
branches or spurs. There appeared to have been a short spur running west
which cannot be traced (possibly another holding station) and a branch from
the quarry track that leads into the clitter which can be traced but eventually
fades from view. The schematic shows it running into the entrance of Quarry
B, this is explained later.
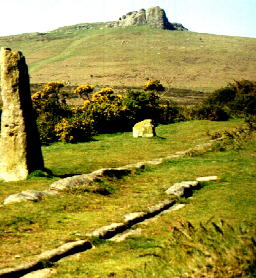
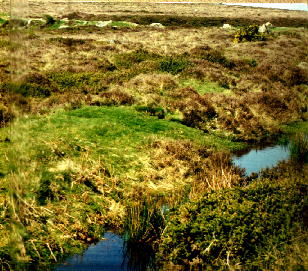
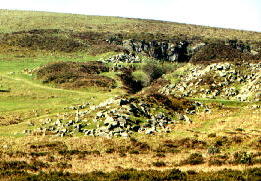
It appears that a tramway or up to three tramways (Newman et al, 1999) followed the earthworks that can be seen in the picture below. The main branch the bends around and eventually turns into the quarry where traces of it are lost. A fairly decent picture of the track coming over the embankment and turning SSE towards the quarry entrance can be seen below. There is also a line leading to site 5, on the northern side of the quarry. Indentations in the track and parts of other track can be seen where this line is crossed by a short length of track (Points O) whose primary use will have been waste disposal for it extends onto one of the many spoil heaps around the quarry. |
Embankment and track veering towards SSE. |
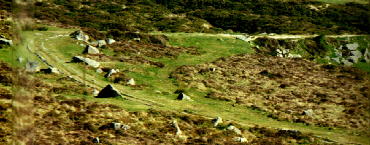
| The track that heads off to join the main trunk of the tramway curves around at its northern extremity but no indentations in the main track can be seen to prove that it actually joined the main tramway as it is seen today. See Points N, Site 5. The most likely scenario for this length of track, is that it was not used after the main trunk of tramway was built to Holwell and Middle Quarries and was built to service both the original entrance to Quarry B and the later north westerly entrance to Quarry B where it cuts the spoil around the quarry. |
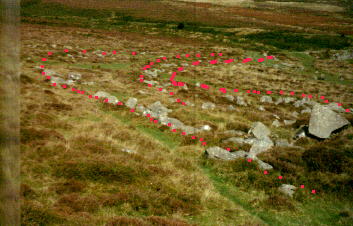
The curvi-linear earthworks mark the line of the original track into the first quarry B. Where the red lines that mark the earthworks converge is Points P. |
An inspection of the quarries show them to be fully worked (except
Quarry A) with well spaced rock jointing, the production of granite from
here will have been of high quality, the absence of granite with many megacrysts
as described in the granite section will have made this stone fine construction
material though possibly slightly boring to look at. The quarries here
are effectively two quarries, B an C. It is possible that wagon loading
took place from this steep face dividing the two quarries onto the wagons
in the ravine below at a later stage of the quarries' development.
At the rock faces, granite was removed and pulled back to the western part of
the quarry area for splitting and cutting. Good examples of the Feather
and Tare method of cutting can be seen on many blocks within this quarry.
See the Extraction and Transportation section of
this site. The quarry hosts two pools of water in which lie the remains of
some hoisting gears and poles, again see the Extraction
and Transportation section of this website for an overview of how the
granite was extracted. These remains though are very likely to be from 1914
when the Quarry was worked for granite for the Exeter War Memorial.
The track configuration suggests that possibly these large quarries
were developed in several stages, a discussion of this can be found
in the phases of development page of this website. Further evidence for
their development comes from a study of the waste tip alignment around the
quarries and how later waste and spoil tips have cut and are cut by track
and other earthworks. An example of this are the earthworks left by the
lines formed by removed track (now only now visible as the earthworks
lining up with points P, (see the accompanying picture).
|
|
Phil's work forced me to re-evaluate my thinking for this quarry, most
notably with regard to the spoil tips at Spoil B aligning with Quarry B's
entrance and the fact that the MW/SE track into Quarry B cuts spoil around
the quarry which means it postdated the development
of the spoil generated by the original quarry. Further waste removed
from quarry B would therefore have been tipped on and along Spoil A.
The waste tips for the original Quarry B are those seen on the schematic as Spoil A and Spoil B. However the track leading to Spoil A cuts Spoil around the rim of the quarry. The alignment of Spoil B suggests an original entrance on it's NE side. The entrance has since been obliterated by the mining of Quarry C. Spoil from this quarry was dumped at Spoil C which aligns nicely with the present entrance to Quarry C. The track leading to the entrance of Quarry B will probably have followed the line of the curvilinear earthworks mentioned above, these generally line up well with the original entrance to Quarry B, joining the tramway at Points P. The track was possibly shifted west several times to accomodate spoil or there was simply more than one track. Some of the track used to access this original entrance may well have been used elsewhere around these quarries when these tracks were abandoned. Only a few setts can be found amongst the earthworks. When Quarry C was developed, parts of Spoil B were cut and the original entrance to Quarry B undermined to the NE. For this reason further track was laid from Points R or Points S curving around to encounter Quarry B from the NW. The track possibly went to the original main entrance to the quarry (imagined simply by following its present trajectory), but as this was further undermined, a second entrance was cut through the spoil along the northern rim of Quarry B. Points T suggest a length of track also went to the original main Quarry B entrance. |
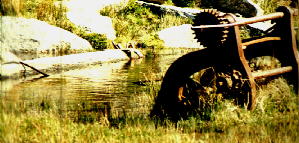
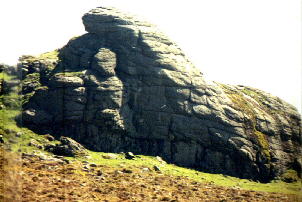
Hoisting and pulling gear at Hay Tor Quarry B. The spoil taken from the new entrance ended up as Spoil A (as mentioned
above) which again aligns nicely with this later entrance.
|
Hay Tor Quarry, entrance and large quarry behind. |
Quarry C's entrance can be seen today adjacent to Spoil C and again
the track leads back to points P. There are some buildings on the eastern
side of the quarries and it is possble that before the track was fed into Quarry
C, it originally terminated at these buildings and was later diverted and
used to access Quarry C, or may have been specifically developed to serve Quarry C.
Quarry A is really just a hollow and very under-developed. One sett can be found amongst the rubble suggesting it might have been connected to the tramway or that it might have been used as an area for working on the Setts for the tramway. The alignment of this sett was 38 degrees, so presumably this track may have at one time joined the northerly access track to Quarry B. |
| Site 8; Widecombe to Bovey Old Road 75907685
|
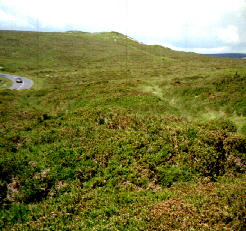
The Ordanance Survey Map, 1886 and shows a path leading
from the old Bovey Tracey to Widecombe Road in the direction of the track mentioned in
Site 1. The path dosen't appear to go anywhere
and in fact ends abruptly. Just opposite the car park seen today at this
site are what remains of this path (see pictures). A shallow depression
and a ridge, this is exactly what can be seen on other parts of the tramway
where the track has been lost from veiw or removed.
It is possible therefore that an original tramway or cart track did actually reach as far as this road and that by 1886 all that could be made out was a path. In a letter to me dated 11th October 1999, Phil Newman states that he considers that this was probably a track of some sort possibly associated with quarrying but equally likely to be from the military episode in the 1880's when troops camped between Hay Tor and Saddle Tor. Stuart Callon Copyright ©1999, 2002 |
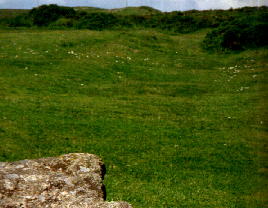
Shallow depression marks the line of the path shown on the map and the probable route of the tramway from the road. |